
When it comes to selling custom products online, great design equals great sales.
No matter how strong your marketing or niche is, your visuals are what convert browsers into buyers. For UV printing, design plays an even bigger role — because the technology can capture microscopic detail, vibrant colors, and tactile textures that traditional printing can’t.
Whether you’re creating custom signs, packaging, or merch, understanding how to design effectively for UV printing can dramatically improve your product’s quality and perceived value.
In this guide, the experts at CutPrintShip share practical design tips to help your UV printed products look flawless — both online and in your customers’ hands.
1. Understand How UV Printing Works (and Why It Matters for Design)
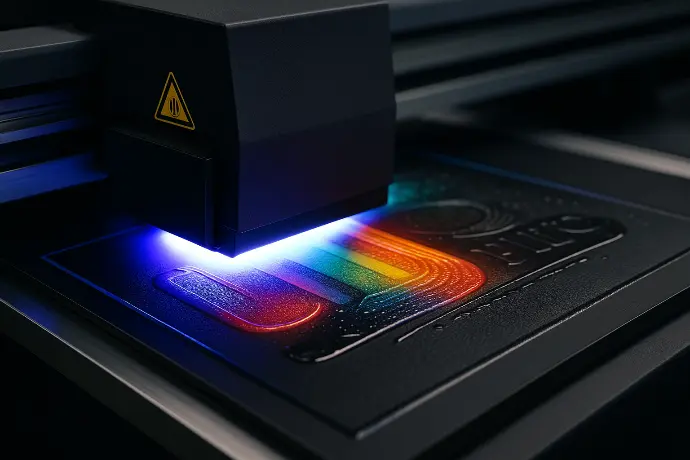
Unlike traditional printing that soaks ink into the surface, UV printing cures ink instantly with ultraviolet light, making the design sit on top of the material.
This process allows:
- Crisper detail
- Vibrant color on light and dark surfaces
- Raised textures and spot gloss finishes
- Durable, scratch-resistant prints
But it also means your design choices — from color to texture — must complement this unique printing method.
PRO TIP
Think of UV printing as a hybrid between printing and embossing — it doesn’t just add color, it adds dimension.
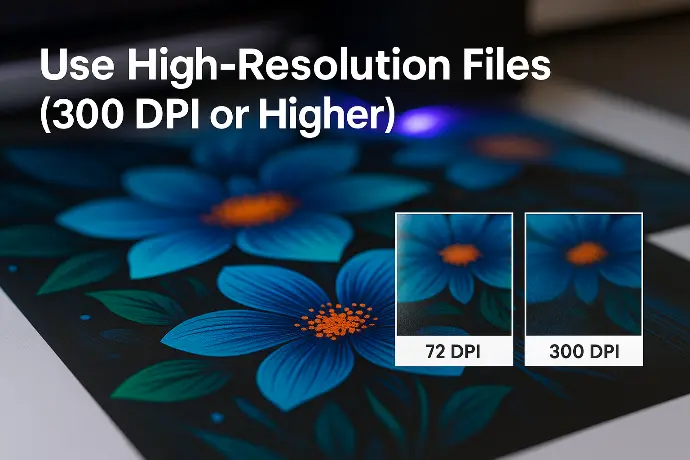
2. Use High-Resolution Files (300 DPI or Higher)
Since UV printing reproduces incredibly fine detail, the resolution of your artwork matters more than ever.
Low-resolution files (like those saved for web at 72 DPI) can result in blurry or pixelated prints, especially on larger surfaces.
Recommended File Settings
- Resolution: 300 DPI or higher
- Color Mode: CMYK (not RGB)
- File Formats: PDF, AI, EPS, or TIFF (avoid JPEG compression)
PRO TIP
Always embed fonts or convert text to outlines to prevent substitution or distortion.
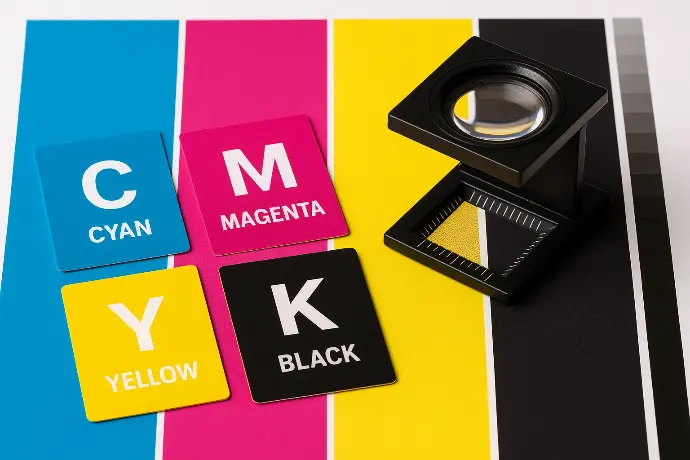
3. Design for CMYK Color Accuracy
UV printers use CMYK (Cyan, Magenta, Yellow, and Black) inks.
If your file is in RGB (the digital screen color space), the printed colors may appear slightly darker or less saturated.
How to Ensure Color Accuracy
- Design in CMYK mode from the start.
- Avoid neon or overly bright digital colors that don’t exist in print.
- For deep blacks, use a mix like C: 60, M: 40, Y: 40, K: 100.
- Use Pantone color matching if your brand has strict color consistency needs.
At CutPrintShip, we use calibrated color profiles to ensure consistent results across every print run — so your designs always look exactly as you envisioned.
4. Plan for Texture: Raised UV and Spot Gloss Finishes
One of UV printing’s most powerful features is the ability to add texture through selective layering of clear UV ink.
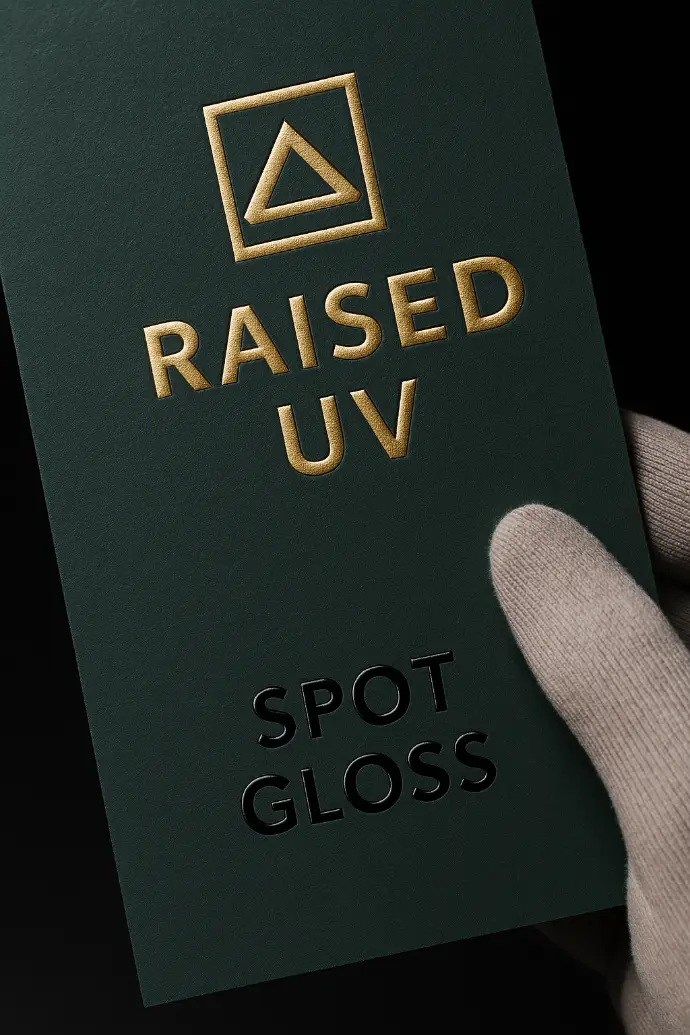
Raised UV
- Creates a 3D embossed feel
- Great for logos, patterns, or typography
- Adds luxury and tactile engagement
Spot Gloss
- Adds shine to specific design elements (like text or icons)
- Contrasts beautifully with matte surfaces
- Perfect for premium packaging or business branding
DESIGN TIP
Don’t overuse texture. Instead, apply it strategically — like emphasizing a logo, accent, or call-to-action area.
5. Optimize Contrast and Readability
High-contrast designs are essential for readability and visual impact — especially when printing on transparent or colored materials like acrylic, metal, or glass.

Design Guidelines
- Use light text on dark backgrounds or vice versa.
- Avoid thin fonts on textured materials.
- Add stroke outlines or drop shadows for depth and separation.
- Test your design against the actual substrate color (not just a white digital mockup).
PRO TIP
If printing on transparent acrylic, consider using white ink layers behind your design to make colors pop.
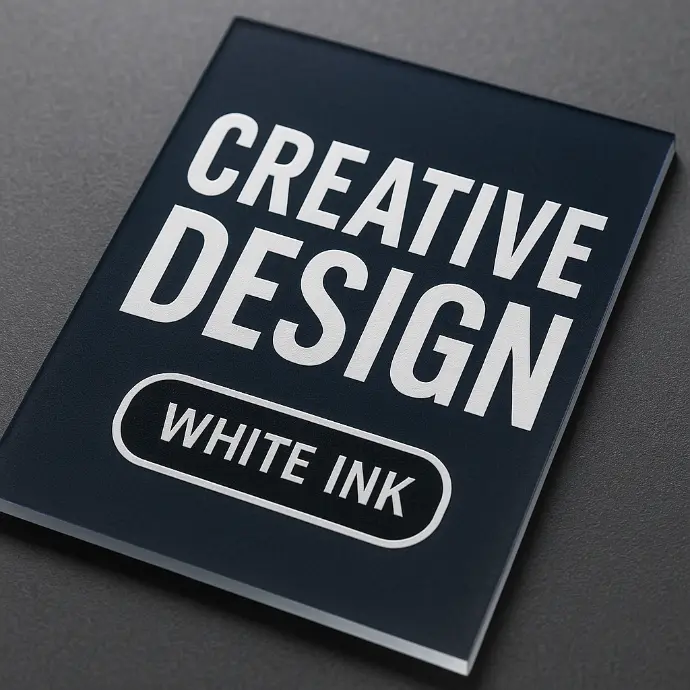
6. Master the Use of White Ink
UV printers can print opaque white ink, which is key for printing on clear, metallic, or dark materials. It acts as a base layer that enhances color brightness and ensures design visibility.
When to Use White Ink
- For clear or translucent substrates (acrylic, glass, etc.)
- To create multi-layered effects (color + transparency)
- For reverse printing on back-mounted signs
DESIGN TIP
In your artwork, use a separate layer labeled “White Ink” to define where the white base should print.
This technique is especially popular for backlit signs, window displays, and high-end retail products.
7. Mind Your Margins and Bleeds
To ensure perfect edge-to-edge coverage and avoid cutting errors, include bleed and margin zones in your artwork.
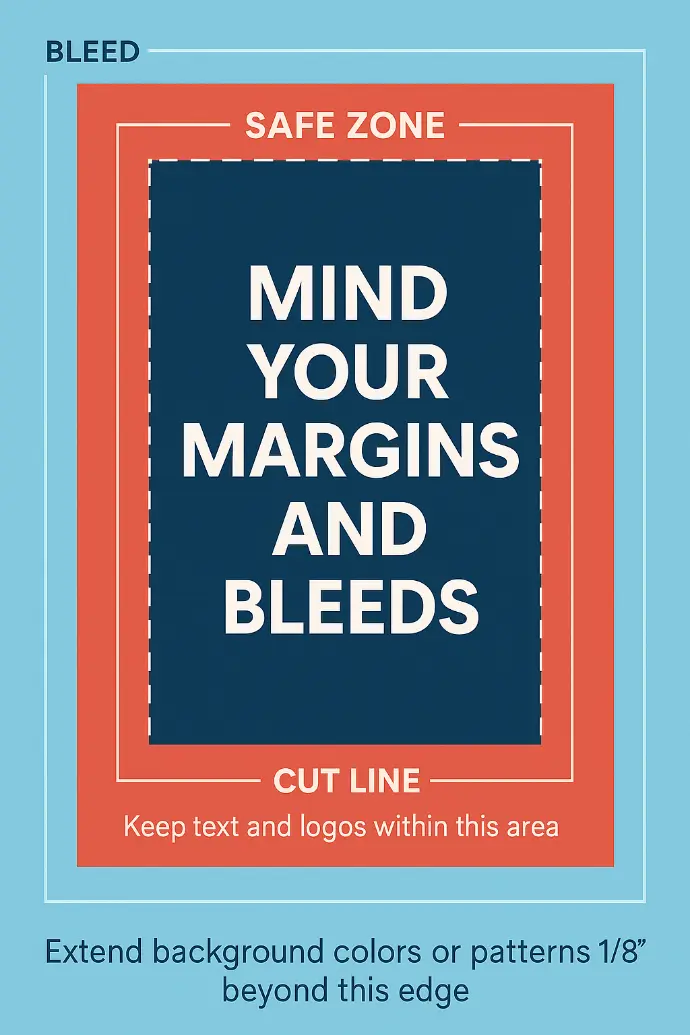
Best Practices
- Bleed: Extend background colors or patterns 1/8” (0.125”) beyond the edge.
- Safe Zone: Keep important text or logos at least 1/8” inside the cut line.
- Alignment: Use vector guides, not raster shapes, for precise edges.
Even the most advanced printers can have slight variations — proper bleeds ensure that your final prints look polished and professional.
8. Keep File Layers Organized
If you’re sending layered artwork (like a PSD or AI file), organization is crucial.
Label each layer clearly so the printing team can understand your intent.
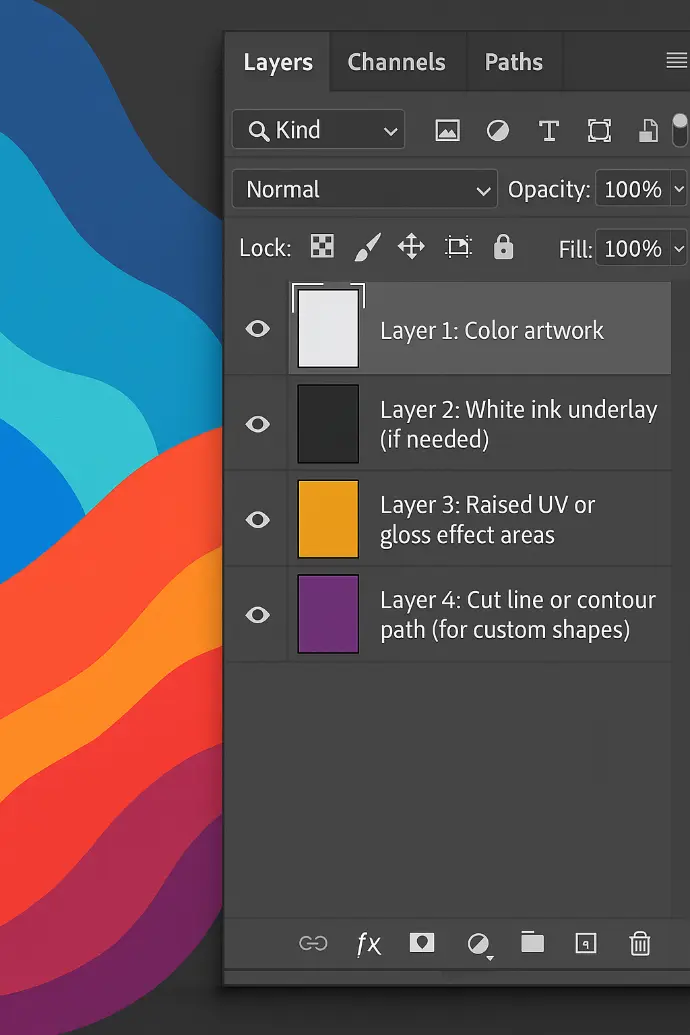
Suggested Layer Structure
- Layer 1: Color artwork
- Layer 2: White ink underlay (if needed)
- Layer 3: Raised UV or gloss effect areas
- Layer 4: Cut line or contour path (for custom shapes)
This ensures smooth prepress preparation — and prevents costly misprints.
At CutPrintShip, our prepress specialists review every file for alignment, ink layering, and substrate compatibility before printing, ensuring flawless execution every time.
9. Simplify for Impact
In design, simplicity sells.
Busy or overly complex layouts can look cluttered once printed — especially on smaller items like keychains or badges.
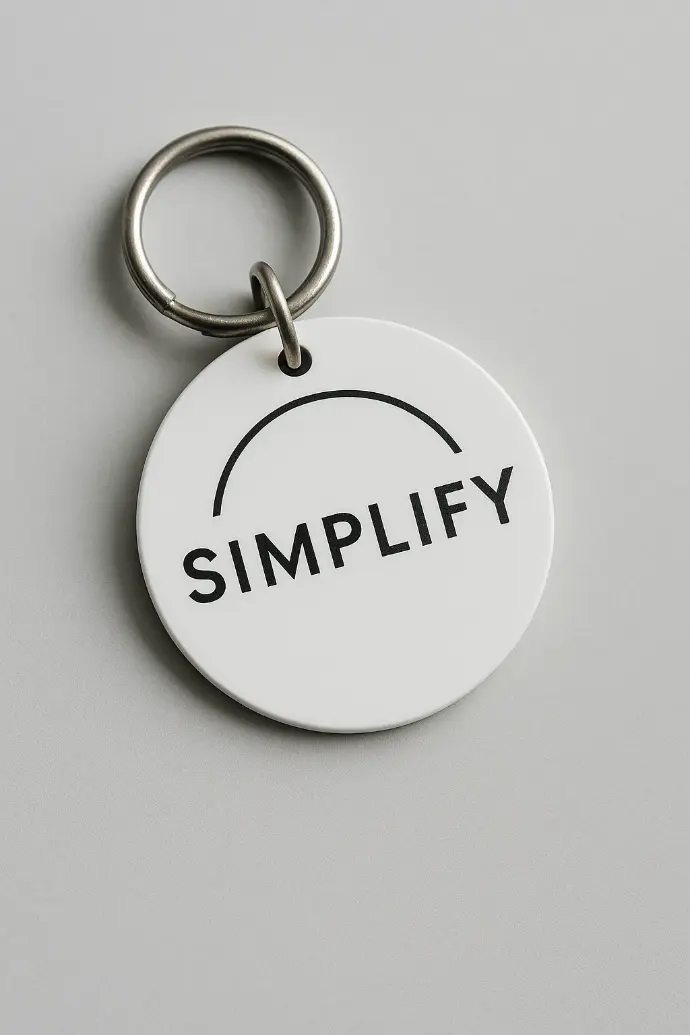
Design for Clarity
- Focus on one focal element (logo, name, or artwork).
- Limit your color palette to 3–5 tones.
- Use negative space strategically.
- Keep text legible at all sizes (minimum 6pt recommended).
Minimalist designs often feel more modern, premium, and brand-aligned — perfect for online product photography.
10. Mock Up Before You Print

Don’t rely on imagination — visualize your design in context.
- Before sending to print, create digital mockups that simulate:
- Material texture
- Light reflection (gloss or matte)
- 3D layering or transparency
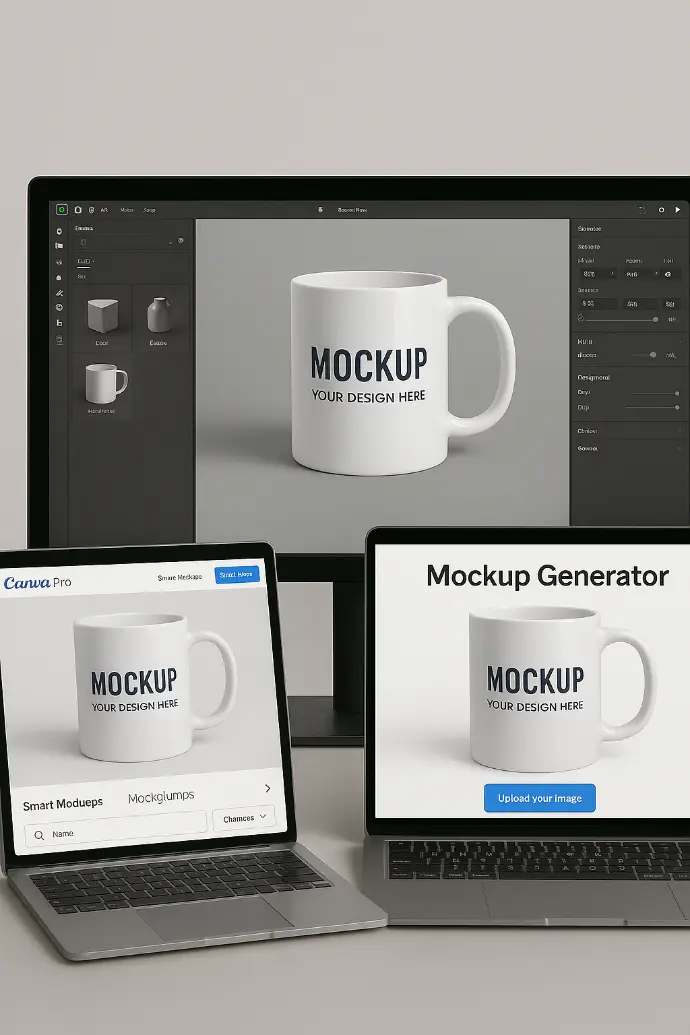
Tools to Use
- Adobe Dimension or Photoshop Smart Objects
- Canva Pro’s Smart Mockups feature
- Online product mockup generators
Mockups help you catch color issues, spacing errors, or readability problems before you print — saving both time and money.
11. Prepare Files Correctly for Print
Even the best designs fail without proper setup. Always follow professional prepress standards.

File Prep Checklist
Convert fonts to outlines
Embed linked images
Remove hidden layers or notes
Set color profiles to CMYK
Save at print resolution (300 DPI minimum)
Include a PDF proof or preview image
PRO TIP
Always do a sample print or test run before large production to confirm color and finish accuracy.
12. Think Like a Customer
Beyond technical perfection, remember that your design should evoke emotion and relevance. The best-selling UV printed products are those that connect with customers on a personal or aesthetic level.

Design Strategies That Drive Sales
- Solve a problem: “Custom sign to make your brand pop at trade shows.”
- Evoke emotion: “A personalized acrylic plaque that celebrates milestones.”
- Follow trends: Seasonal themes, minimalist typography, bold colors.
At CutPrintShip, we often see that designs that tell a story — not just display a logo — drive the most engagement and repeat sales.
Conclusion
Designing for UV printing is equal parts creativity and precision. By understanding how the process works — and following best practices for file prep, color, and composition — you can ensure every print is vibrant, professional, and visually striking.
Whether you’re an artist, small business owner, or eCommerce brand, mastering UV print design helps your products rise above the competition — literally and figuratively.